
You can find the deployed app over here
Transcription is the process of converting audio to text. Although you can implement a Machine Learning Model to get the text from audio, it is cumbersome.
- Extensive knowledge of audio signal processing is needed to extract features from an audio signal.
- A large amount of data will have to be mined/scraped from various sources
- Knowledge of Machine Learning Libraries such as PyTorch or Tensorflow is required
Fortunately, AssemblyAI has a free tier version available which lets us transcribe audio by making a few requests.
In this article, we will build a web app that can transcribe audio using AssemblyAI and Streamlit, a Python Library to build UIs for Machine Learning Models.
You can find the repo with the entire source code here
Requirements
- An AssemblyAI account (sign up for free here)
- An AssemblyAI API key (you can find it here)
- Basic Knowledge of Python 3.5+( Note: I will using Python 3.9 for this tutorial)
- Although not required, familiarity with the requests library will be helpful
Libraries we will use
AssemblyAI
AssemblyAI is used to convert audio to text. It provides a REST API that can be used in any language that make a REST API call such as JavaScript, PHP, Python, etc. We will be using Python to make requests to the API.
Streamlit
Streamlit is an open source app framework for building a UI for Machine Learning Models without needing to know HTML, CSS, or JavaScript. It has an extensive library of pre-built components that can be used to build a simple UI in a matter of minutes.
Requests
We will be using the Requests library to make requests to AssemblyAI’s REST API.
Python-dotenv
We will be using the Python-dotenv library to read variables from .env files.
Setting up the Project Directory
Create a new folder/directory using the command line
mkdir ASSEMBLYAITo keep secret credentials secret, it’s good practice to store credentials inside a .env file. We can then use the Python-dotenv library to read the credentials from the .env file. We could also store them in environment variables, if preferred.
Inside the new directory you created, ASSEMBLYAI, create two new Python files and a .env file
If using Windows:
New-Item main.py, transcribe.py, .envAnd if using macOS or Linux:
touch touch main.py && transcribe.py && touch .envThe file main.py will contain all the code related to the Streamlit UI while the file transcribe.py will contain the helper functions and the code which interacts with AssemblyAI’s API.
You can download a sample MP3 file from here. Name the file “testData” and save the it inside the ASSEMBLYAI directory.
Setting up the Project Environment
Ensure you are in the ASSEMBLYAI directory, if you are not just use the cd command to change directory.
cd ASSEMBLYAIIf this is your first time working with virtual environments, you’ll have to install virtualenv
If using Windows:
python -m pip install — user virtualenvAnd if using macOS or Linux:
python3 -m pip install — user virtualenvFirst, we need to create a virtual environment by entering the following code on the command line:
If using Windows:
python -m venv venvAnd if using macOS or Linux:
Python3 -m venv venvWe will then need to activate the local virtual environment with the following command on the command-line:
If using Windows:
venv/Scripts/activateAnd if using macOS or Linux:
source venv/bin/activateFor more details on how to setup a virtual environment, refer to this website.
To install the Requests, Steamlit and Python-dotenv libraries respectively, we can enter this one line on the command line:
pip install streamlit, requests, python-dotenvThis will install the up-to-date libraries required.
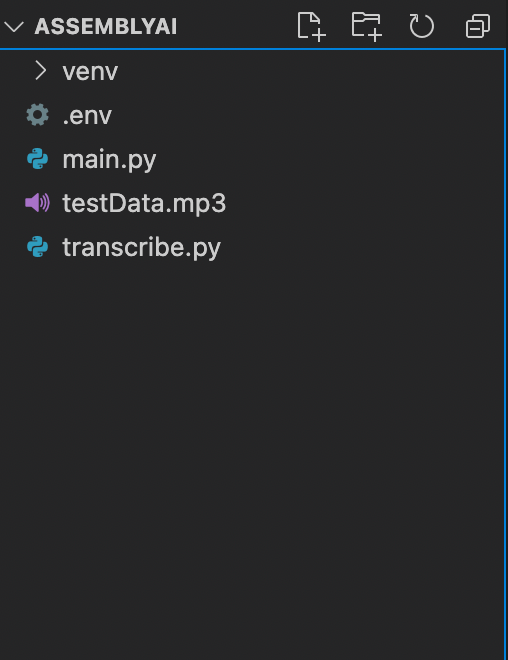
This is how your file structure should look.
Add API Key to .env file
- Open the .env file you had created in the “Setting up the Project Environment” section
- Add the following
API_TOKEN = “Your API Key”- Replace the string “Your API Key” with the API Key given to you by Assembly AI
How to clone the repo and run it
- Go to the GitHub repo and download it
- Start a command line and change directory to downloaded folder
- Setup a virtual environment by following the previous section
- Activate the virtual environment
- Create a .env file inside the downloaded folder and add your API Key (Refer to the previous section)
- To install the required libraries, you can type the names manually and install them or use the requirements.txt file provided
If using Windows:
pip install streamlit, requests, python-dotenvAnd if using macOS or Linux:
pip install streamlit requests python-dotenvOr
pip install -r requirements.txt- Once all the requirements have been successfully installed, type the following command
streamlit run main.pyThis should run the webapp. You can try uploading a file.
Transcribing mp3 files
Before building the UI, we will need a few helper functions which we can use to upload the file to AssemblyAI’s server for the model to work on and return the transcribed text.
The code for the helper functions should be written in the transcribe.py file
Import the required modules
This piece of code should be present at the beginning of the transcribe.py file
import os
from dotenv import load_dotenv
import requests
Helper Function 1: Uploading a local audio file to AssemblyAI
The first function we need to write is a way to upload an audio file stored on our local machine. This function should be present inside the transcribe.py file
The AssemblyAI model expects the file to be accessible via a URL. Therefore, we will need to upload the audio file to blob storage to make it accessible via a URL. Fortunately, AssemblyAI provides a quick and easy way to do this.
We need to make a POST request to the following AssemblyAI API endpoint:
https://api.assemblyai.com/v2/upload
The response will contain a temporary URL to the file, we can pass this URL to the back to the AssemblyAI ‘transcript` API endpoint. The URL is a private URL accessible only to the AssemblyAI servers.
All the uploads are immediately deleted after transcription and never stored.
We will use Python’s request library that we installed earlier to make the POST request
def get_url(token,data):
 ‘’’
 Parameter:
 token: The API key
 data : The File Object to upload
 Return Value:
 url : Url to uploaded file
 ‘’’
 headers = {‘authorization’: token}
 response = requests.post(‘https://api.assemblyai.com/v2/upload',
 headers=headers,
 data=data)
 url = response.json()[“upload_url”]
 print(“Uploaded File and got temporary URL to file”)
return url- The function accepts a couple of the parameters: the API token and the file object to be uploaded
- We make a POST request to the above-mentioned AssemblyAI Upload API endpoint and include the API token and the file object as a part of the request body.
- The response object contains the URL to the uploaded file. This URL is returned by the function
Helper Function 2: Uploading a file for transcription
Now that we have a function to get a URL for our audio file, we will use this URL and make a request to the endpoint which will actually transcribe the file. This function should also be present inside the transcribe.py file
Initially, when we request a transcription the audio file has a status of “queued”. We will talk more about how the file goes from being “queued” to “complete” in the last helper function. For now, we only need to make a request to the Transcription Endpoint along with the URL to the file. We need to make a request to the following AssemblyAI API endpoint:
https://api.assemblyai.com/v2/transcript
This function is pretty similar to the previous function.
def get_transcribe_id(token,url):
 ‘’’
 Parameter:
 token: The API key
 url : Url to uploaded file
 Return Value:
 id : The transcribe id of the file
 ‘’’
 endpoint = “https://api.assemblyai.com/v2/transcript"
 json = {
 “audio_url”: url
 }
 headers = {
 “authorization”: token,
 “content-type”: “application/json”
 }
 response = requests.post(endpoint, json=json, headers=headers)
 id = response.json()[‘id’]
 print(“Made request and file is currently queued”)
return id- The function accepts a couple of the parameters: the API token and the audio file URL from the previous function.
- We make a POST request to the AssemblyAI “transcript” API endpoint.. If an audio file is not currently in progress, the new file is immediately processed. If there is a transcription in progress,, then the new audio file is queued until the previous job is complete.
If you wish to be able to run multiple jobs simultaneously, you will need to upgrade to a premium plan
- The response object will contain the ID of the transcription. This ID along with a separate endpoint will be used to get the status of the transcription.
- The function will then return this ID
Helper Function 3: Downloading an audio transcription
Once we have the transcription ID of and audio file, we can make a GET request to the following AssemblyAI API endpoint to check the status of the transcription
https://api.assemblyai.com/v2/transcript/{transcribe_id}
The status of transcription changes from “queued” to “processing” to “completed” as long as no errors are encountered.
We will need to poll this endpoint until we get a response object with the status “completed”.
We can make use of a while loop to continuously make requests to the endpoint. During each iteration of the loop, we will check the status of the transcription. The loop will keep on running till the status is “completed”. This process of making requests and waiting till the status is complete is known as polling. We will implement this polling feature in the “Building the Streamlit UI” section.
The following function will simply get the current status of the prescription. This function should be present in the transcribe.py file
def get_text(token,transcribe_id):
 ‘’’
 Parameter:
 token: The API key
 transcribe_id: The ID of the file which is being
 Return Value:
 result : The response object
 ‘’’
endpoint= f”https://api.assemblyai.com/v2/transcript/{transcribe_id}"
headers = {
 “authorization”: token
 }
 result = requests.get(endpoint, headers=headers).json()
 return result
Helper Function 4: Requesting a transcription from the UI
Our third function will call both of the previous functions successively.
This function will also be connected to the “Upload” button in our Streamlit UI. The function has only one parameter: the file object. The function will do the following
- It will load the API token from our .env file.
- It will use the token to call the previously defined functions
- It will return the transcription ID
Below is the code snippet for the function. This function should be present in the transcribe.py file
def upload_file(fileObj):
 ‘’’
 Parameter:
 fileObj: The File Object to transcribe
 Return Value:
 token : The API key
 transcribe_id: The ID of the file which is being transcribed
 ‘’’
 load_dotenv()
 token = os.getenv(“API_TOKEN”)
 file_url = get_url(token,fileObj)
 transcribe_id = get_transcribe_id(token,file_url)
return token,transcribe_id- We will use the load_dotenv() function to load our .env file. Then using the We will use the get() function in the os library, to read the API token from the .env file.
- Call the get_url() function with the file object and token as parameters
- Call the get_transcribe_id() function with the token and file_url returned by the get_url() function
- Return the token and the transcription ID
Building the Streamlit UI
Now that we have all the required helper functions, we can begin work on the Streamlit UI.
However, before moving on to the actual code of the Streamlit UI, let’s take a look at the Streamlit components we will be using.
- header(string), subheader(string),text(string) — These components display text of various sizes on our UI. header() can be thought of as the <h1> tag, subheader() as <h2> and text() as <p>
- file_uploader(label) — This creates a button to upload the file. The parameter label is the string to be displayed above the button. It returns a file object. We will use this to accept files from the user
- progress(integer) — Creates a progress bar. The integer has to between 0 and 100. It represents the percentage of the specified task completed. If we create a for loop with a sleep of 0.1 s b/w each iteration, we can create a cool progress bar animation
- spinner(label) — The label is displayed as long as we are inside its code block
- balloons() — This displays balloons, yup it is pretty cool 🎈
Building the components of the UI
The below code should be written in the main.py file. The main.py file will be the entry point for our web app.
First, we will need to import all our required modules and libraries
import streamlit as st
from transcribe import *
import time
transcribe is the name ofthe file with our helper functions.
To make sure that you have imported the libraries currently, you could try running the following command in the command line. Ensure your virtual environment is activated before running the command and you are currently in the root folder (ASSEMBLYAI)
streamlit run main.pyYou should see a blank web app. To re-run the app, either you can click the hamburger menu and click on Rerun or you can open the web app and press “Ctrl + R” or “Cmnd + R”
Let’s start by creating a header and the upload button.
Type the following code in the main.py file
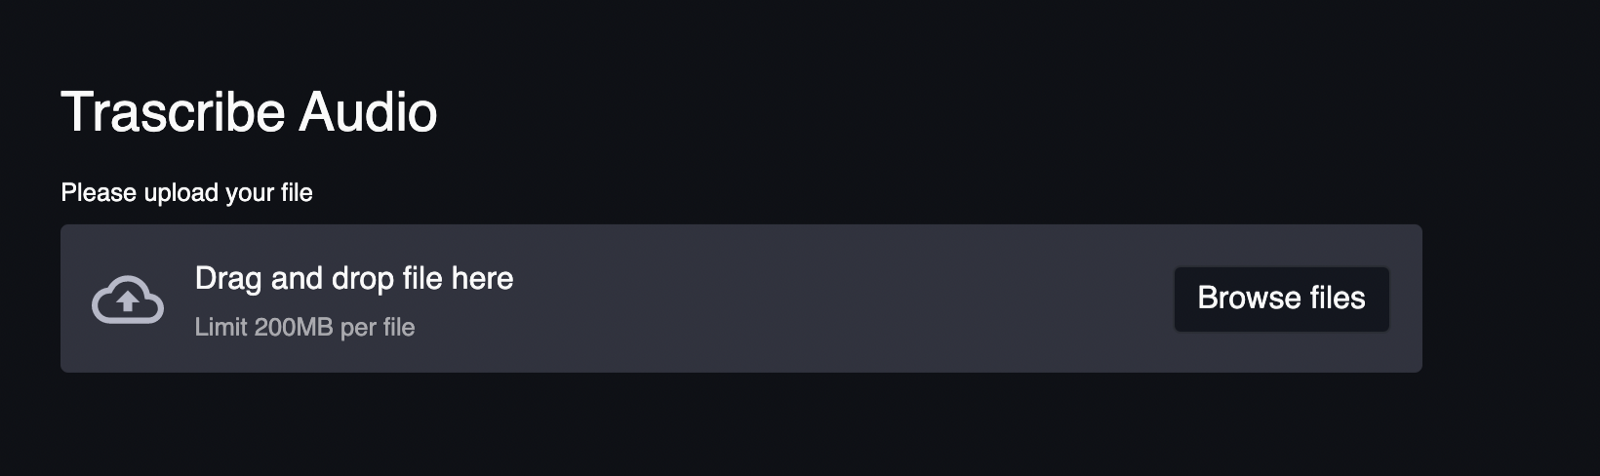
st.header(“Transcribe Audio”)
fileObject = st.file_uploader(label = “Please upload your file” )
After you re-run the app, you should see the following
Initially, the variable is “None”, once the file is uploaded the variable’s value is the file object.
if fileObject:
 token, t_id = upload_file(fileObject)
 result = {}
 #polling
 sleep_duration = 1
 percent_complete = 0
 progress_bar = st.progress(percent_complete)
 st.text(“Currently in queue”)
 while result.get(“status”) != “processing”:
 percent_complete += sleep_duration
 time.sleep(sleep_duration)
 progress_bar.progress(percent_complete/10)
 result = get_text(token,t_id)
sleep_duration = 0.01
for percent in range(percent_complete,101):
 time.sleep(sleep_duration)
progress_bar.progress(percent)- Essentially, if the variable fileObject is not “None”, we call the upload_file function.
- We use a while loop to poll the endpoint.
- A progress bar is created and in every iteration of the while loop, the program sleeps for a second and increments the percentage of the progress bar by 1
- Once the status changes to “processing”, the sleep time is decreased to 0.01 second. This results in a pretty cool animation where initially, the progress bar progresses slowly and once the file is being processed it progresses really quick

- Once the progress bar is at 100%, we poll the endpoint again. This time to check if the status is “completed”. We use the spinner() function to show text on the screen while we are polling
st.balloons()
st.header(“Transcribed Text”)
st.subheader(result[‘text’])- Once the status is “completed”, we exit the while and loop show balloons on the screen using the balloons() function
- Finally, we display the transcribed text on the screen
Conclusion
Congratulations! 👏 You have successfully built a web app that can transcribe audio. Some additional features you could build on top of the web app
- AssemblyAI lets the user specify Acoustic Model and/or Language Model. You could use Streamli’s select box to build a drop down like feature
- Add a feature that lets the user record their voice and transcribe it. This might be slightly complicated since Streamlit doesn’t have any in-built components to record voice. However, you can use HTML and JavaScript to build such a feature. Check out this answer for reference.